Sunday, January 31, 2010

Groceries for February

This month, I'm going over my $400 usual grocery budget. We have extra funds right now and we bought some indulgent ingredients. Still, at under $600 for the month (including milk money and fresh veggies money set aside for mid-month), we're meeting the USDA Cost of Food (for a family of 4) Thrifty Plan. Stick with me all month and I'll show you just how fabulous thrifty can taste!

I went to two stores this weekend. Usually, I only go to one, but I needed some specialty ingredients that Publix carries, but my commissary does not.

Here's what I bought:
At the Commissary (military grocery store):
  • cornflakes
  • cheese balls (impulse buy!)
  • shortening
  • dill pickles (gallon)
  • vegetable oil
  • 5 lb granulated sugar
  • 5 lb bread flour
  • 3 lb linguine
  • taco seasoning
  • 2 lb milk chocolate chips
  • 2 bags whole wheat egg noodles
  • 5 lb whole wheat flour
  • diet coke (weakness)
  • 2 x Panko bread crumbs
  • 2 packs of individual serving applesauce (for me, oral surgery tomorrow)
  • 1 lb split peas
  • yeast (in the glass jar)
  • 1 lb lentils
  • cream of chicken soup
  • fruit snacks (kids' weakness)
  • sushi rice (10 lb)
  • basmati rice
  • 2 large jars of peanut butter
  • Ritz crackers
  • salsa
  • large honey bear
  • diced tomatoes
  • spicy pickles (husband's weakness)
  • soy sauce
  • 4 boxes of kashi granola bars on deep discount
  • a bag of sugar-free candies on clearance (my mother-in-law is coming for a visit and eats these)
  • sunflower seeds
  • popping corn
  • ground ginger
  • molasses
  • almonds
  • canned corn
  • Pringles Sticks on deep discount
  • rolled oats (the big canister)
  • case of sweet peas
  • green beans
  • whole berry cranberry sauce
  • ketchup
  • Wheaties x 2 on deep discount
  • Reese's Puffs on deep discount
  • case of apple juice
  • Snausages (Diego's weakness)
  • paper towels (8)
  • bread bags
  • sandwich bags
  • fabric softener
  • dishwasher soap
  • 3 CFL bulbs
  • 2 regular light bulbs
  • Swiffer liquid
  • Press & Seal wrap
  • big box of trash bags
  • dish soap
  • 3 - 18 packs of large eggs
  • 2 gallons milk
  • 1/2 gallon chocolate milk
  • buttermilk
  • 3- 3 lb blocks cheddar cheese
  • 2 - 1 lb blocks mozzarella
  • whipping cream (2 small, 1 large)
  • 3 lb butter
  • 2 boxes cream cheese
  • yogurt cups
  • American cheese
  • a case of carrot-orange juice
  • 4 - 3 lb bags of boneless, skinless chicken breasts
  • Yoplait smoothie mix (50 cents each) x 6
  • frozen cheese ravioli x 2
  • frozen potatoes and green beans x 2
  • frozen broccoli x 2
  • big bag of pizza rolls (impulse buy)
  • pork sausage
  • turkey smoked sausage
  • bacon
  • ham slice
  • 2 lb ground turkey
  • tortillas
  • corn tortillas
  • whole wheat tortillas
  • bread crumbs
  • stuffing mix x 2
  • razor blade refills
  • deodorant
  • body wash
  • vitamins
  • Aspercream
  • antacid
  • 2 lb ground sirloin
  • 2 packs mushrooms
  • fresh thyme
  • Campari tomatoes
  • fresh mint
  • lettuce
  • carrots
  • 2 sweet potatoes
  • collard greens
  • fresh cilantro
  • avocados
  • sweet onions
  • green onions
  • red potatoes
  • bell peppers (5)
  • lime
  • garlic

Total = $420.00 exactly
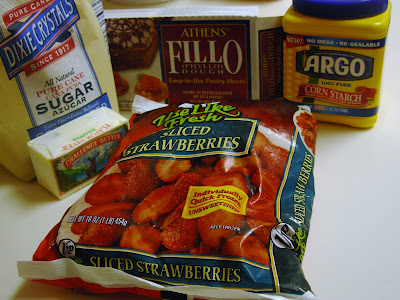
And at Publix:

  • 3 packages lamb rib chops
  • ground chicken breast
  • slider rolls
  • sea scallops
  • buffalo sauce
  • chicken nuggets
  • cheese straws (impulse buy)
  • Havarti singles
  • sirloin steak
  • deli roast beef
  • 2 bags of bread (usually I make but I am going to be out of commission for a couple days)
  • stuffed mushrooms (impulse buy)
  • flank steak
  • arugula
  • milk
  • strawberries
  • coffee creamer
  • Gruyere cheese
  • heavy whipping cream
  • confectioner's sugar x 3
  • vanilla beans x 2
  • Blue cheese
  • tomato paste
  • custard powder
  • brown sugar
  • 2 lb ground sirloin
  • check stand snacks and drinks for hungry family

Total = $139.34

Total for February = $559.34

Making Your Own Chicken Stock

Making your own chicken stock takes some time, but it's very easy to do. Set aside a few hours on a Saturday to get this done. There is no comparison between homemade stock and store-bought varieties. If you have a leftover chicken carcass anyway, why not put it to good use and make some rich, flavorful stock for another meal? Your homemade stock can be refrigerated for a few days, or frozen for a few months. If you plan to freeze it, it's a good idea to do so in one or two cup portions. That way, you can thaw only what you need.


The first step in making homemade stock is to roast the vegetables. This exaggerates their flavors and gives the stock its rich, golden color and flavor.

Use whatever vegetables you need to use up. Today, I used 3 carrots, a large onion, a head of garlic, four shitake mushrooms, and a handful of green onions. Don't peel the veggies. Leave everything on, even the skin of the onion and garlic.


Dump them all in a 9x11" baking pan lined with aluminum foil. Drizzle with a few tablespoons of olive oil and sprinkle with sea salt and cracked black pepper.


Roast at 425 degrees for about an hour.


Next, cut up your chicken carcass. Don't be bad like me and leave all this meat on the bones! Use the meat in other recipes. Cut up the chicken. Separate it at the joints. Dump the chicken into a large stock pot.


When the vegetables are done roasting, dump them into the pot with the chicken.

Add a whole bunch of fresh parsley. Don't bother taking the stems off or chopping it. Just dump it in. Throw in some salt and pepper and a crumbled dried bay leaf. Fill it to within 3" of the top of the pot with water. Bring to a boil.

Skim the foam off the top as the soup starts to boil. Then, reduce the heat to low, cover, and simmer for about two hours.

Remove from heat and pour the soup through a colander. Discard the chicken and veggies.

Then, line the colander with cheesecloth and strain the broth. You'll collect some funky-looking gunk on the cloth, and your broth will be golden and pristine.

Now, let it cool, then package it and store it in the fridge or freezer.

When Life Gives You Lemons


Day 31.


The first month of the new year draws to an end today. I've had a lot of fun sharing my creations with you all and look forward to more sharing. I'm finally getting my new camera! It should be here this week, so I'll be playing around with it and learning how to take fabulous food pictures.


In case it hasn't become obvious for you yet, my family loves lemon. If I could use only one flavoring, it would be lemon, because it would keep the whole family happy. I'd miss the chocolate, though. Still, lemon is a super ingredient. It's cheap (I pay under 35 cents per lemon), it's readily available at any supermarket, and it packs a lot of flavor. Using both the juice and the zest makes the tartness stand out more.


Lemon Poppy Seed Pancakes
Serves 5 (2 pancakes each)
Ingredients:
  • 2 cups flour (Try cake flour in this recipe. It's wonderful!)
  • 1/4 cup granulated sugar
  • 1 Tbsp plus 1 tsp baking powder
  • 1/2 tsp sea salt
  • 2 Tbsp poppy seeds
  • 2 large beaten eggs
  • 1/2 cup sour cream
  • 1 cup milk
  • the juice and zest of one lemon
  • butter for the pan

How it's Done:

  1. Combine flour, sugar, baking powder, salt, and poppy seeds in a large mixing bowl.
  2. In a separate bowl, whisk together the eggs and sour cream until smooth. Add milk, lemon juice and zest.
  3. Add all at once to dry ingredients. Stir only until just moistened.
  4. Heat a skillet to medium-low. Add a pat of butter. Cook pancakes (dropped by 1/2 cup measure) 30 to 60 seconds per side. They won't bubble up so you have to watch for doneness.

Saturday, January 30, 2010

Sliders!


Day 30.


Sliders are so much fun. If you're unfamiliar with them, sliders are just small burgers. They're fun to serve and fun to eat. Tonight, I made a trio of Sliders and it took me less than 30 minutes from start to finish. I didn't make the buns from scratch this time.


Trio of Sliders


serves 6


Buffalo Chicken Sliders

Ingredients:
  • 6 Slider buns
  • 12 chicken nuggets, cooked
  • 1/4 cup buffalo sauce

*Cook nuggets. Toss with buffalo sauce. Place 2 nuggets on each bun.

Sirloin Blue Cheese Sliders

Ingredients:

  • 6 Slider buns
  • 3/4 lb ground sirloin
  • a bit of blue cheese
  • salt and pepper to taste

*Crumble blue cheese. Put a chunk of cheese in the middle of a small ball of sirloin. Enclose and flatten to form a small patty. Salt and pepper to taste. Cook on a medium-high skillet until desired doneness is attained. Place on bun. Top with additional blue cheese.

Chicken Avocado Sliders

Ingredients:

  • 6 Wheat Slider buns
  • 3/4 lb ground chicken breast
  • squirt of lime juice
  • salt & pepper to taste
  • avocado, thinly sliced
  • 3 Tbsp mayonnaise
  • 1/2 tsp minced garlic
  • 1 tsp lime juice

*Form chicken breast into 6 small patties and sprinkle with salt and pepper. Squirt with lime juice. Cook on griddle until no longer pink. Meanwhile, combine mayo, garlic, and lime juice. Spread on buns. Place chicken on mayo, then top with avocado.

Friday, January 29, 2010

I Love to Make My Own


Day 29.


January is almost gone! I was supposed to have oral surgery today, but the dentist wants me on antibiotics through the weekend, so I have to go back Monday afternoon. The anticipation is the worst. I need a lot of work in my mouth, and it's going to be a while before I'm up to eating "real food" again. I've been trying to come up with things I will be able to easily eat. Since what I can eat will be limited, I need to make sure that what I do eat is nutritious. I was thinking about:


  • split pea soup with NO HAM, pureed till smooth - Lots of protein, fiber, and very filling


  • Muscle Milk. I bought some at GNC today.


  • yogurt. I have a yogurt maker. Yes, I even make my own yogurt. :)


  • Ice cream! Ditto. I have the KichenAid ice cream attachment, and it makes delicious ice cream. I was thinking it would be nice blended with my Muscle Milk.


  • Soup with tiny pasta, like orzo, and tiny bits of spinach, over-cooked.


What do you eat when you have dental work done, or have mouth pain? Baby food is out. So are mashed potatoes. I existed on these foods solely the whole time I was healing from my wisdom teeth removal in my teens. Thinking about eating them makes my stomach churn.


I picked up this little gem at Tuesday Morning today. You should see if you have a Tuesday Morning in your town. They're great little shops with plenty of surprises. You never know what you're going to find a Tuesday morning: French Milled Soap. Plush doggy beds. One-of-a-kind trivets. Ice pop makers. You just never know.


Anyway, always a sucker for a kitchen gadget, and loving making my own things, I couldn't pass this up at $9.99. The box provides a website for buying more bags for the freeze pops, and you use your own juice (there's a recipe booklet for mixing flavors, but we went with straight Juicy Juice Tropical this time), which means no nasty chemicals or weird coloring.

It was a fun 15 minutes spent with my daughter. It was simple enough that she was able to do most of it by herself with me snapping away with the camera.

First, you measure your juice. The measuring cup's markings are done by "pop." One pop, two pops, three pops, or four pops.


Then, you pour the juice into the top of the plunger. The top of the plunger is like a giant funnel, making it easy for little kids to pour the juice in without making a mess of things.

Next you put a freeze pop bag onto the nozzle and press the plunger down. Juice flows into the bag. One plunge equals one filled freeze pop bag. The bags self-seal when you take them off, which we both thought was really, really cool.

The next step is admiring your handiwork and putting the freeze pops in the freezer to harden.

I suspect this will be a hit with the whole neighborhood this summer. I love it because it allows the kids to make something on their own AND it gets 100% juice into them instead of 100% artificial colors and flavors. I can't wait till the day I own a juicer. Imagine the flavor combinations we'll make then!

I give this product an 8 on the Kid Friendly Cooking scale. It's simple, fun, economical, quick to assemble, takes NO batteries, and encourages healthy eating for children. It's easy to clean up and doesn't take up much storage space. The self-sealing bags add immensely to the coolness factor. Also, the set comes with Popsicle molds, which we didn't use today, but definitely will use in the future. The box says this is for ages 5 & up, and I agree with that recommendation. Smaller hands will have a hard time pushing the plunger, but a parent could help with that part.

Thursday, January 28, 2010

Buttermilk Bread...and a note


Day 28.


Tomorrow, I'm going to the dentist, and if all goes well, I'll be having a lot of work done. I will try to post a recipe, but be patient with me if I can't. I may very well be eating baby food bananas tomorrow. :)


Meanwhile, here's a quick bread machine recipe that I love to use on busy nights when I need sandwiches for the next day. Bread machines can be purchased for pennies on the dollar at any thrift shop near you. I don't use mine much anymore. I find it more economical to make bread by hand. However, it's a great time saving tool and a good way to introduce yourself to homemade bread. I bought my bread machine for $5 at a thrift store. Keep an eye out for one for your own kitchen.


Buttermilk Bread Machine Bread

makes 1 1/2 lb loaf


Ingredients:


  • 1 cup warm buttermilk

  • 2 Tbsp butter, cut into small pieces

  • 3 Tbsp honey or agave nectar

  • 1 tsp sea salt

  • 3 cups bread flour

  • 1 1/2 tsp active dry yeast

How it's Done:


  1. Add all ingredients to your bread machine in the order recommended by your machine's manufacturer. Set to regular light loaf and walk away.

  2. Wait until the loaf is cool to slice it, or else it will fall apart.

Picture Me Blushing


I'm so honored! An award? For my brand new baby blog? How humbling! I'd like to thank my friend @ I am NOT a Volcano for this award. I'm touched. :*) She always has some ego-boosting compliment to lay on me for my recipes. I really appreciate her comments and would like her to know how much she's helped boost my blogging confidence. Before December, I knew very little about blogging. I just had an idea to put up some recipes and strive to make everything from scratch. Not a Volcano, you really have given me the boost I needed this month. I hope you will continue to visit. :)
Seven Interesting Things About Me
  1. I'm addicted to kitchen gadgets. If I could, I think I'd own every single one ever made. Just to experience it. I want all the pots, all the pans, all the bake ware and cookware and tools and small appliances and do-dads there are. And they're all on my Amazon Wish List. Hey! It's a WISH list. ;)
  2. I'm afraid of the Boogie Man. When I watch a scary movie (which I love, especially the older ones), I have to be under a blanket. The closet door must be closed securely. And my husband must be right next to me, prepared to cuddle me at intense moments.
  3. I can put together a delicious and beautiful recipe easily, but don't ask me to decorate my house or my body. I have no interior design or fashion sense, whatsoever.
  4. It's more important to me that the baseboards are clean than the toys are put away. Dirty baseboards bother me.
  5. I Can't Stand the way an empty toilet paper tube feels. It has the same effect on me as nails down a chalkboard. When I have to change the roll, I try really hard not to touch the tube. It can be done. Trust me. I know.
  6. Dinner at my house is unpredictable. It might be served at five o'clock. It might be served at eight o'clock. You just never know. I'm pretty bad at planning serving time. And I go off on tangents with my cooking experiments.
  7. I'd love to be a freelance writer for newspapers. I don't know how to go about doing it. I keep meaning to find out.

Upon receiving this honor, I'm supposed to nominate seven other blogs for the same award. I nominate the following seven fabulous blogs:

  1. Carrie at Ginger Lemon Girl. Ginger Lemon Girl is one of the first blogs I started reading. She's a gluten-free cook. I'm not, but her recipes are delicious and easily adaptable to my preferences.
  2. Alison at AliCakes. Have you seen her little cupcakes and other delicious concoctions? They're so pretty. I bake, too, and Allison has a similar style to me. I love seeing what she's up to!
  3. Joy in Cooking. She makes really cool things. Check out her pot stickers. Hers is a blog I will be sure to keep up with.
  4. Megan at What Megan's Making. I love her Husband Scale. It's a lot of fun to feed a husband and see his reaction.
  5. For the Love of Cooking. Her pictures are wonderful! I hope to get a newer camera soon and start taking some better pictures. Meanwhile, I can have all the eye candy I want right at her blog!
  6. Jenn at Jenn's Food Journey. Love her recipes and pictures. It's almost Super Bowl time. quick! Go check out her appetizer recipes. You may never go back to the freezer section again!
  7. The Mennonite Girls at Mennonite Girls Can Cook. They really can. Check them out. Good, hearty, delicious, beautiful food abounds here. They're so awesome that I'm almost intimidated to include them here. I feel unworthy. ;)

If you've been nominated, will you pretty please pay it forward? Here are the guidelines:

  • Thank the person who nominated YOU. :)
  • Copy the award and post it you YOUR blog.
  • Link back to the person who nominated you.
  • Share 7 interesting things about yourself (yourselves).
  • Nominate 7 more bloggers for this award.
  • Post your link to those 7 blogs.

Now I will go float around on a cloud of happiness and plan my grocery list for next week. :)

Wednesday, January 27, 2010

Black Bean Burgers


There's been a lot of indulgent recipes featured here lately. It's time to lighten things up a bit. For lunch today: Black Bean Burgers on homemade buns. These burgers are easy to put together and impressive enough for the most devout carnivores in your life.


Black Bean Burgers
serves 12


Ingredients:
  • 1 can black beans, rinsed and drained
  • 2 heaping cups cooked brown rice
  • 1/4 cup flour
  • 1 beaten egg
  • 3 green onions, sliced
  • 6 slices of jalapeno peppers
  • 3 Tbsp salsa, as hot as you like it
  • 1/4 cup almonds, ground finely
  • salt & pepper to taste
  • buns, lettuce, and sour cream or mayo to serve
How it's Done:
  1. In the bowl of your food processor, combine all ingredients except buns, lettuce, and sour cream. Process until thoroughly combined but still a little lumpy.
  2. Shape into patties. Drop onto a skillet (preheated to medium-high and sprayed with non-stick spray) and cook five minutes on the first side, and three or four on the reverse side.
  3. Serve on buns with lettuce and sour cream.


***Recipe note: As you are processing your ingredients, remember not to over-process. You want some chunkiness left in the burger. Your mash should be pretty thick. Remember paste in elementary school? It should be that thick. If it feels like cooked oatmeal, you'll want to thicken it up a bit. You can achieve this by adding more flour, or some bread crumbs, or some rolled oats. Be sure to cook your rice until dry. I've made this with freshly cooked rice as well as leftover rice, and I don't recall there being much difference. Just keep it thick, using whatever ingredient you have on hand. The finished burgers have the mouth feel of a traditional meatless burger. If they're too wet, you'll have some tasty "sloppy joe" -- fine if you want a sloppy joe, but not if you're looking for the burger pictured above. :)

Sunshine on a Cloudy Day


Day 27.
We've just celebrated the 100th day of school. When I was in elementary school, we didn't celebrate the 100th day. I don't know when it started, but the kids always celebrate it now. One year, when one of my children was in kindergarten, the students were given a project to complete for the 100th Day of School: They were to collect and mount on poster board 100 items. My child decided on 100 Fruit Loops, glued on in the shape of the number 100. She did all the work herself. When we arrived in class that morning, the other students' parents had "helped" with their projects, and there were elaborate battle scenes with 100 green Army men, 100 plastic ants munching on watermelon, and many more. In retrospect, 100 tiny saucers with 100 real, tasty mini cupcakes to serve to peers would have been a knockout. My ideals wouldn't have allowed it, though. I firmly believe in children doing as much of their own work as possible. It's a nice thought, though. 100 tiny decorated cupcakes. Mmmm.
I've decided to do a giveaway here at All Home Cooking on Day 100 -- Sort of a milestone. I haven't decided what I'll give away yet. I want it to be something I really like. I'll give some thought to it and keep you updated.
Meanwhile, go make a batch of these sunny pancakes and absorb some vitamin C.
Orange-Pineapple Pancakes
makes about 15 - 4" pancakes
Ingredients:
  • 2 Tbsp vegetable oil
  • 1 egg, beaten
  • 2/3 cup milk
  • 1/3 cup orange juice
  • 1 cup crushed pineapple in its own juice
  • 2 Tbsp granulated sugar
  • 4 oz cream cheese, softened
  • 1 1/2 cups all-purpose flour
  • 2 tsp baking powder
  • 1/4 tsp sea salt

How it's Done:

  1. Preheat your griddle or skillet to medium-high. Spray with non-stick cooking spray.
  2. In a mixing bowl, combine oil, egg, milk, juice, pineapple, sugar, and cream cheese.
  3. In another bowl, combine flour, baking powder, and salt. Add all at once to liquid mixture. Stir to combine only until all the ingredients are wet.
  4. Drop by 1/4 cup measure onto preheated griddle or skillet. Cook 2 to 3 minutes until bubbles form, flip, and cook another 1 1/2 minutes or so. Serve right away.

Tuesday, January 26, 2010

Potato Broccoli Soup with Parmesan Cheese


Day 26.


Use-it-up week continues. I've said it before: soup is such a frugal thing to eat. It's also a fantastic way to use up (and mask) leftovers at the end of a grocery week. Here's a recipe that helps use up bits of things. I considered adding sour cream or cream cheese at the end. I didn't...but if you do, please write and tell me how it turns out.


Potato Broccoli Soup with Parmesan Cheese


serves 8


Ingredients:


  • 1 shallot, chopped


  • 1 onion, roughly chopped


  • 1 Tbsp olive oil


  • 2 cloves garlic, minced


  • 4 cups water


  • 12 oz frozen broccoli


  • 2 cups leftover mashed potatoes


  • 1 tsp ground nutmeg


  • 2 tsp freshly cracked black pepper


  • 2 tsp sea salt


  • 5 dashes of hot sauce


  • 1 cup grated Parmesan cheese


  • 1 1/2 cups milk


How it's Done:


  1. Heat oil in a soup pot. Saute shallot and onion until the onion is clear. Add water and broccoli. Bring to a boil. Add mashed potatoes, stirring to combine. Stir in salt, pepper, nutmeg, and hot sauce.


  2. In small batches, puree the soup in your blender or food processor. Return to pot.


  3. Add Parmesan cheese and milk. Stir to blend. Heat gently. Serve.

Monday, January 25, 2010

French-Canadian Meat Pie


I have ancestors from all over the globe. Something I'd like to do this year is try a dish from all of the countries my ancestors called home. Many of them hail from Canada.


A couple of years ago, my grandmother presented me with a cookbook of all of her personal favorite recipes. There was a recipe for this sort of meat pie in there. I don't know what happened to the recipe, but I do remember the flavors, so I decided to try my hand at it alone. Here's how I make it without her recipe:
French-Canadian Meat Pie
serves 6-8
Ingredients:
  • 2 lb lean ground pork
  • 1 large onion or 2 medium onions, diced
  • 2 cloves garlic, minced
  • 1 cup beef broth
  • 1 tsp each sea salt and freshly ground black pepper
  • 1/2 tsp savory
  • 1/4 tsp each cinnamon and nutmeg
  • 1 cup mashed potatoes (mashed roughly, leaving lumps behind)
  • pie crust for a double crust pie
  • 1 egg, beaten with 1 Tbsp water

How it's Done:

  1. Cook the pork in a skillet until no longer pink. Don't overcook it.
  2. Add broth, onions, garlic, salt, pepper, savory, cinnamon, and nutmeg. Bring to a boil. Reduce heat and simmer uncovered for 30 minutes, stirring occasionally. Remove from heat and stir in mashed potatoes. Set aside.
  3. Roll out 1/2 of pie crust into the bottom of a 9" deep dish pie plate. Mound filling into pie crust. Top with the other 1/2 of the dough. Vent. Brush the top crust with the beaten egg/water mixture.
  4. Bake in preheated 400 degree oven for 50 to 60 minutes, until golden brown. Let the pie sit for 10 minutes before cutting.


A Surprise for the Lunch Box Crowd


We're packing lunches this week. Next year I plan to try my hand at really cool Bento-style lunches. Bento fits in with my cooking style: fresh, whole foods -- as unprocessed as possible. It also uses all the senses, which really appeals to me. But this year, it's just regular old lunch box lunch. And tomorrow, my lunch box crowd gets Triple Lemon Cookies. Mmmmmmm...


Triple Lemon Cookies


makes about 18 large cookies


Ingredients:


  • 1/2 cup butter, softened


  • 1/2 cup vegetable shortening


  • 1 1/2 cups granulated sugar


  • 2 large eggs


  • the juice AND rind of 2 lemons


  • 1 1/2 tsp baking soda


  • 2 1/2 tsp cream of tartar


  • 1/4 tsp salt


  • 2 3/4 cups all-purpose flour


For Glaze:


  • 1 1/2 cups confectioner's sugar


  • 3 Tbsp lemon juice (fresh!)


  • the zest of 1 lemon


How it's Done:


  1. Preheat oven to 400 degrees.


  2. In a mixing bowl, cream butter, shortening, and sugar. Add eggs, one at a time, beating well between each addition. Scrape the sides of the bowl. Add the lemon juice and zest, and beat well.


  3. Combine flour, baking soda, cream of tartar, and salt in a medium bowl. Slowly add to wet mixture, scraping sides of bowl often. Beat until well combined.


  4. Drop by tablespoon onto ungreased cookie sheets. Bake 10 minutes or so, until sides are slightly browned. Remove from cookie sheets right away and let cool on wire racks completely.


  5. Combine glaze ingredients in a bowl. Spread generously over cookie tops. Leave them to set on the counter.


  6. Devour them mercilessly. :) Alternatively, save them for the lunch boxes like you're supposed to.

A Sweet Treat to Start Your Week


Day 25.
One day, not too long ago, my sister posted on her Facebook that she was craving Strawberry Toaster Strudel. That day, I told her I'd try making some strawberry strudel that tasted similar to the frozen convenient sort. Today, I did. Only it tastes better. And it wasn't terribly difficult, either. To my sister: You should come visit me and I'll make it for you!
Strawberry Strudel
serves 8
Ingredients:
  • 12 sheets filo dough, thawed
  • 3 Tbsp melted butter
  • 3 cups sliced strawberries (It's wintertime. I used frozen.)
  • 3 Tbsp corn starch
  • 1/4 cup granulated sugar

How it's Done:

  1. Preheat the oven to 375 degrees. Cover a large cookie sheet with aluminum foil and spray liberally with non-stick cooking spray. Set aside.
  2. In a mixing bowl, combine strawberries, corn starch, and sugar. Set aside.
  3. Gently spread a small amount of melted butter on one sheet of filo dough. Cover with a second sheet and butter again. Cover with a third sheet and butter once more.
  4. Position 1/4 of the strawberry mixture near a short end of the dough. Tuck the sides in, then gently roll up the dough, enclosing the filling as you go.
  5. Gently transfer to your prepared cookie sheet.
  6. Continue this process, using three sheets of filo for each bundle, until they're all rolled.
  7. Spread a little melted butter on top of each roll and sprinkle with granulated sugar.
  8. Bake for 25 minutes, or until golden brown and slightly crisp.
  9. If desired, make a drizzle icing from 1/2 cup confectioner's sugar, 1/2 tsp vanilla, and 1-2 Tbsp milk for topping.

Strawberry on FoodistaStrawberry

Menu Plan Monday 1/25 - 1/31


Another Monday! Time to plan my menu for the week. This is grocery shopping week, so by default, this is Use it Up week. Come back each day for recipes and pictures!


Breakfasts:


  • onion cheese quiche


  • strawberry strudel


  • butter pecan waffles


  • huevos rancheros


  • English muffin bread with butter & jam


  • bagels with cream cheese


  • lemon bread


Lunches:


  • veggie burgers and home fries


  • bean & cheese quesadillas


  • lentil tacos


  • macaroni and cheese


  • leftovers


Dinners:


  • Ravioli Casserole


  • Black Beans & Yellow Rice


  • Creamy Broccoli Soup with Garlic Cheddar Biscuits


  • French Meat Pies


  • Chicken and Cheese Tamales


  • Egg Rolls & Sizzling Rice Soup (didn't get to make this last week)


  • Chicken Pot Pie in Puff Pastry


Snacks and Dessert:


  • Cheese & Pepperoni Stuffed Pretzel Bites


  • Soft Pretzels


  • Hot Fudge Cake with Vanilla Ice Cream


  • Blueberry Cupcakes with Lemon Buttercream Icing


  • Mini Apple Turnovers


For more menu planning inspiration, visit I'm an Organizing Junkie. There you'll find hundreds of other menu plans to help you on your way to creating your own.

See you later! :)

Sunday, January 24, 2010

Homemade Even When You're Away All Day

Red Velvet Cheesecake from The Cheesecake Factory

Stuffed Tortillas from The Cheesecake Factory

Day 24.


Today was my birthday lunch with my mother and sister at The Cheesecake Factory. We were going to be gone all day, thrift shopping and being tourist-y and spending time together, so making sure the family had home-cooked food required a little planning.


But it didn't take much effort or time. Here's how to avoid relying on convenience foods on a very busy day:


  1. Breakfast: Everyone was still asleep when we left this morning, so I scrambled some eggs and put them in individual bowls, covered, and in the fridge with reheating instructions. On the counter, I left bowls of ready-to-cook oatmeal: 1/2 cup oats, 2 Tbsp brown sugar and 1/2 tsp cinnamon (instructions: Add 1/2 cup milk and microwave 1 minute.)


  2. The past few days, I've been certain to create leftovers. I made a list of lunch choices for the family to reheat. There was soup, rice, veggies, fruits, and cheeses.


  3. For dinner, in case I wasn't home in time (and I wasn't), I threw some frozen chicken, onions, and BBQ sauce in the crock pot. I set it to low and it could cook all day long.


There was air-popping corn for snacking, as well as fruits and veggies. It's getting close to grocery shopping day, so the selections are getting slim, but there's plenty to eat without resorting to take-out or a convenience store...or even a grocery store, for that matter.

Thoughts on my meal at The Cheesecake Factory: My entree was Stuffed Tortillas. It was okay, but the corn cakes on the side were delicious. I plan to try to recreate them, only better, in the near future. My cheesecake was the Godiva Chocolate Cheesecake. It was very, very rich. I stole a bite of my mother's cheesecake (Steffanie's Red Velvet Cheesecake) and it was The. Best. Ever. I also plan to recreate that...one of these days.

More home cooked food tomorrow. For now, it's bedtime.

Saturday, January 23, 2010

This Recipe Will Make Your House Smell Good


Day 23.


Time to get the slow cooker out. It's a cold, dreary Georgia day. It's the perfect weather for slow cooked food.


Citrus Chicken in the Slow Cooker


serves 6


Ingredients:


  • 6 pieces of chicken (I used 3 individually quick frozen -IQF- chicken breasts and 3 IQF chicken thighs)


  • 1 cup sherry


  • 3/4 cup dried fruit (I used dried cherries)


  • 1/3 cup orange marmalade


  • 1/4 tsp ground cloves


  • 1 vidalia onion, sliced into thin rings


  • 1 lemon, sliced into thin rounds (remove seeds)


  • 1 orange (I used honey bells, which are in season now), sliced into thin rounds


  • the juice of one orange


How it's Done:


  1. Place the chicken in the slow cooker. Top with sliced onions. Pour sherry over top of chicken and onions. Dot marmalade on top. Slice orange and lemon and arrange the rounds on the chicken and onions. Sprinkle ground cloves on top of that, then pour the orange juice over everything.


  2. Cover and cook on low 8 hours.


  3. Serve over brown rice.

Friday, January 22, 2010

Yin and Yang

Day 22.


My mother is in town visiting today. She brought me a wonderful birthday present. I'm so excited about it! It's a turntable for cake decorating. :) Made my day. The unfortunate thing for Mom is that she's doing Weight Watchers, and can't "afford" the POINTS value of some of my dishes. On today's menu: A little bit of healthy and a lot of not. I served Mom homemade split pea soup -- but I'm sharing the recipe for stuffed cabbage rolls with you here, because they're more interesting. I I'll make split pea soup again this winter, so I'll have another chance to share my recipe. In the meantime, here's a little bit of healthy and a whole lotta not.

Stuffed Cabbage Rolls
makes 10 rolls


Ingredients:

  • 10 large cabbage leaves
  • 1 lb lean ground beef or turkey
  • 1 cup cooked rice
  • 1 cup dry bread crumbs
  • 2 large eggs, lightly beaten
  • 1 clove garlic, minced
  • 1/4 cup minced onion
  • 1 1/2 cups shredded cheddar cheese
  • 1 - 15 oz. can fire roasted diced tomatoes (undrained)
  • 1/2 cup water
  • salt and pepper to taste
  • 10 strips bacon

How it's Done:

  1. Drop the cabbage leaves into a pot of boiling water and let them soften for about five minutes. Drain.
  2. Meanwhile, combine ground beef, rice, bread crumbs, eggs, onion, garlic, 1 cup cheese, salt, and pepper in a large mixing bowl. Use your hands to mash all the ingredients together.
  3. Open a cabbage leaf and mound about 3/4 cup filling in the center. Bring the sides in, completely encasing the filling. Wrap a slice of bacon around the cabbage leaf. Place parcel seam side down in a 9x11" rectangular baking dish. Continue this process until all the leaves are filled. Pour 1/2 cup water into the bottom of the dish.
  4. Cover the parcels with the canned tomatoes. Cover dish with aluminum foil and bake at 325 degrees for one hour. Remove foil, sprinkle with 1/2 cup shredded cheese, and bake another 20 minutes. Serve.

And now for dessert. I've heard a lot about these strange apple pies baked in paper grocery bags. Always up for something new, I decided to try it out for myself today. The results were interesting. The pie was tasty. My only issue with it is that it lacks the crispness in a traditional pie crust. I wouldn't let this recipe dominate my apple pie repertoire, but it was fun for a change of pace. You can find the recipe here.

Here are a few pictures detailing my experience with this pie:

The pie bakes in the paper bag! Everyone you tell this to will warn you to keep a fire extinguisher handy, but as you can see, my bag didn't even singe. Not a bit.

When it's done, you tear the bag open and marvel at the pie. It's not a very pretty pie. It's rather rustic looking. But it's charming in its own way.
Then you dole it out and top it with whipped cream (freshly made, of course) and serve it with a warning: It's Hot. Be Careful!
And everyone oohs and ahhs over the strangely baked dessert. And you enjoy it. But then you go back to baking apple pie the usual way, saving this recipe for it's shock factor.

*NEW!* Stay current on what's cooking!

Enter your email address:

Delivered by FeedBurner

LinkWithin

Related Posts with Thumbnails